Before I get started, I want to welcome Darnell as a follower. Here's her fabulous blog: djkardkreations
So I'm a little late for Easter but as promised, here are the cards I made for the alcohol ink challenges over at Artsy Inkers.
For the first week's challenge, I made agate backgrounds (aka tumbled glass). Here's the tutorial Far North/ Jan included for this technique. Alcohol Ink Tutorial 1
I tried this technique on 3 different types of paper. From left to right - photo paper, glossy cardstock, comic book board. For those you don't know, comic book board is the board used when you store comic books in plastic resealable bags. One side is slightly glossy and the other is matte. It is thicker that paste board (cereal box) but thinner than the chipboard you can buy in a package at Michael's.
The technique did not work on the photo paper at all. When I went to add the drops of blending fluid, nothing happened. And I think I like the way the comic book board reacted to the drops of BF best.
AIs used: Lemonade, Cool Peri, Peach Belini, Shell Pink, Pink Sherbert, Pearl Mixative
And here it the card I made with one of the background (I think it is the photo paper one). The image was one I received in the kit I received as part of March's kit in an envelope swap. I colored him with Copics (I'll list the markers I used at the bottom).
Since the agate technique did not work on the photo paper, I didn't bother using it again. The top photo is the glossy cardstock and the bottom is the comic book board.
AIs used - Stream, Aqua, Pool, Pearl Mixative
And here's the finished card. The image is a digital stamp by Mo's Digital Pencil. I used my silhouette to print and cut it. I colored him with Copic. The green strip is the leftover bit from die cutting grass for another project (I'll be sharing those in another post). The paper was colored with Distress Inks in Mowed Lawn and Pine Needles.
For this piece, the challenge was to remove some of the alcohol ink with blending fluid. To do this, I used a Spellbinders Oval Nesties die as a stencil for applying the blending fluid. I did this on glossy cardstock.
AIs used - Cool Peri, Eggplant (just a little), Purple Twilight, Pearl Mixative
Here's the card I made. The egg is a stamp by Impression Obsession and I stamped it with Stazon. Then I used a green metallic marker to add some color to the egg. I used a strand of iridescent pearls to over the edge of the oval and added a bow made with my bow-it-all to cover the ends of the pearls.
This background was created for a challenge that required using a blending tool to move the ink around. Here's the tutorial for this challenge: Alcohol Ink Tutorial 2
To create this background, I made half circles on comic book boards. AIs used - peach bellini, shell pink, pink sherbert, raspberry, pearl mixative
Here's the card I made with it. Sorry about the shadow, but the only way I could get the colors right was to take the picture in the sun. The image is a digital stamp by Mo's Digital Pencil. I printed and cut it with my silhouette and colored with Copic markers. I made the bow with my bow it all.
I die cut some felt pieces into flowers and stamped with the blending tool onto glossy cardstock.
AIs used - base is lemonade; flowers are raspberry, pool, purple twilight, clover
For the finished card, I used the image from my March received kit, which I colored with Copics.
The technique for this challenge involves using a straw. You drop the ink on the paper and then blow it with a straw. I think this was my favorite technique. Alcohol Ink Tutorial 4
Again I experimented with a couple of different papers to create pieces with the straw technique. The top left piece was on a piece of plastic that was from packaging for something. The bottom left is on glossy cardstock. The bottom right is on acetate. And the top right is a piece of vellum. I keep my vellum in the same container as my acetate. So when I saw the vellum, I thought, gee I wonder if it would work on vellum. The only problem was that it started curling as I was working on it. I used some temporary adhesive to stick it to my desk and kept working.
AIs used - cool peri, lemonade, peach bellini, shell pink, aqua and juniper (although I didn't use the juniper on the glossy cardstock).
Here are the finished card.
For these, I used the vellum and the plastic packaging. The image is by American Art Stamp and colored with Twinkle H2Os. I used brads to attach the alcohol backgrounds to the white cardstock.
For this card, I used the glossy cardstock. The chick is from my received kit for March and colored with Copics. The die cut ovals were in my kept kit. I had cut an oval out of the purple one for another project and used it to frame the chick. The sentiment also came from my received kit.
For this piece, I did embossed resist. This was actually 1 of 4 eggs I did but I wasn't thrilled with how they came out. The egg is by Impression Obsession and the sentiment is by My Favorite Things. The sentiment was heat embossed with metallic green embossing powder. The lace is layered on top of a piece of green ribbon.
I used AI - Peach Belini, Pink Sherbert, Shell Pink, Salmon, Pearl mixative
For this one, I did monoprinting. Alcohol Ink Tutorial 5
I used the packaging from a die to do the printing. The stamps are by My Favorite Things and were stamped with Stazon. I used Spellbinder dies for the oval and scallop oval.
AIs used - Cool Peri, Shell Pink, Peach Belini.
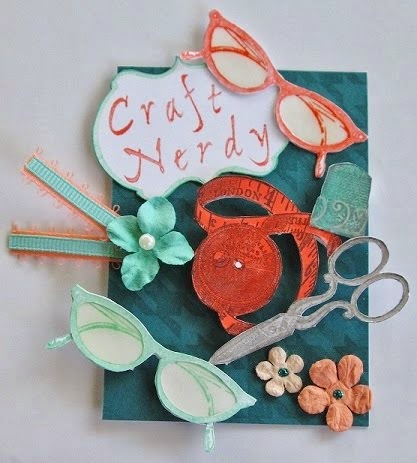
I created the background with Peach Belini, Pink Sherbert, Sandal and Pearl mixative. The stamps are all from My Favorite Things and stamped with Stazon. After stamping, I went back with a white pen and colored some bits in. I really need to remember to do this technique more often because I really like how the white ink looks.
And one more Easter card. Here is the tutorial for this one. Alcohol Ink Tutorial 6
I started by stamping the image on a scrap piece of paper and cutting it into 2 masks - Sir Rabbit and the background.
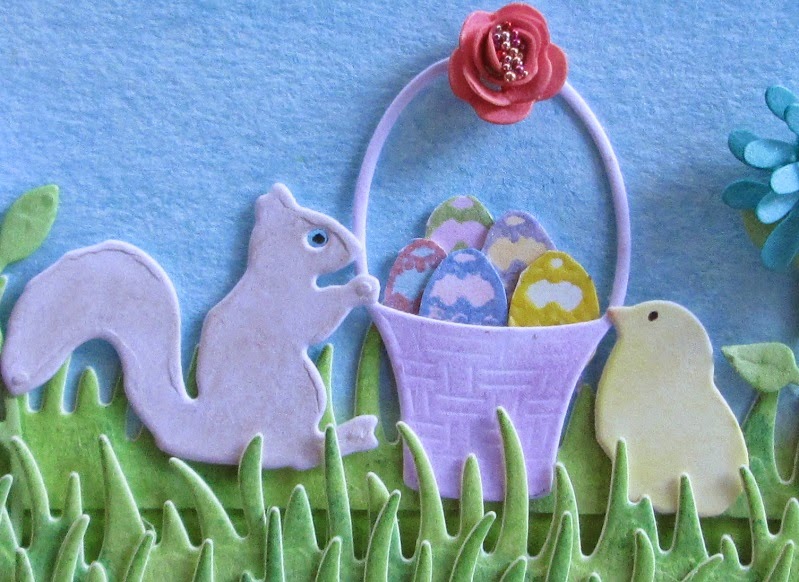
I put the background mask down and colored in Sir Rabbit with Slate, Pool and Willow. I took off the background mask and covered Sir Rabbit with his mask and started coloring the background. I guestimated where the B was going to be and inked it with Lemonade. Then I inked the rest of the background with Aqua, Sandal and Peach Belini. Then I removed the mask and stamped the image using Stazon.
The stamp is by Stampendous.
The green strip was left over after die cutting some grass for another project.
Copics:
Jelly Bean Mouse 1
Jelly Beans - YR02, B02, Y02, G02, V04, RV02, Y000, G00, B00, YR00, RV000, V000
Mouse - E000, W-3, W-0,
Jar - B000
Bunny Boy
Clothes - B02, B00, YG000, YG00, YG03
Chicks - Y02, Y17
Eggs - YG06, B02, BG01, YR02, V15, RV02
Bow - BG09, BG000
Basket - YR21, YR24, YR27
Bunny Girl
Flowers - BV000, BV02, BV04
Bow - BV13, BV17
Clothes - yg03, YG06, Y02, Y17, RV52, RV55
Bunny - RV10, RV000, C-0
Eggs - G02, B02, Y02, BG01, RV52, BV08, BV04, V04, YG01
Basket - YR21, YR20, YR24, YR27, E47
Jelly Bean Mouse 2
Jelly Beans - B00, G00, YR000, YR00, BV00, RV000, Y000
Mouse - E000, E23, E21, R11
Chick - I forgot to write down the colors I used.
Thanks for stopping by and please come again.