Showing posts with label vellum. Show all posts

Tuesday, September 9, 2014

Funky leaves times 2 (Projects 4 and 5)


For today, I’ve got 2 cards I made using the same image but colored using two completely different techniques.

Card Number 1
The first card is one I made for the August vellum challenge over at Artsy Inkers.   So I’m a little behind in posting it here.


The image is by Impression Obsession.  I started by stamping it on watercolor paper with Versamark ink and heat embossing it with clear embossing powder.  Then I did a water brayer technique to color the image.  I inked my brayer using Kaleidacolor Autumn Leaves and then spritz it with water.  I rolled the brayer over the image and added more ink and water until I was happy with it.  I mounted it on a piece of bronze metallic paper.
For the card base, I used a piece of embossed colored vellum that has been in my stash for years.  Here’s a picture of what the vellum looks like.
I attached it to a base of an orangy-brown textured cardstock with glue dots in the corners.  It is always a challenge to figure out how to attach vellum to a project without the adhesive showing.  To hide the glue dots, I added the brown pearls.
 
Card Number 2
For this card, I stamped the image with Memento Rich Cocoa on X-Press It blending paper.  I colored the image with my Copic markers (the color list is at the bottom of the post).  I mounted it on a piece of orange cardstock from my stash that I cut with the deckle blade for my Fiskar paper trimmer.
 
The card base is actually a reject from a WSW14 fest challenge.  It was a reject, not because I didn’t like how it looked, but because it didn’t really show the technique of the challenge.  The technique was to take a piece of patterned paper and emboss it with an embossing folder.  Then you use a brayer to add Versamark ink to the raised portions and emboss with clear embossing powder.  Next you ink up the paper and whip the ink off the embossed portions. 
There were a couple of problems with this piece for showcasing the technique.  I picked a too subtle pp.  And I think the embossed lines were too thin to show the pattern of the paper.  So this didn’t get entered in the challenge and sat forgotten on my craft table.  I spotted it on my desk and figured it would make a great base for this card.  Oh, I used Distress Ink in Spiced Marmalade and Mustard Seed (I think – I did make this back in June) to ink it up.  And I think the pp is by DCWV. 
 
For the final touch, I added ribbon from Really Reasonable Ribbon from the August ribbon of the month assortment.  I really loved August’s assortment.  Lovely fall colors.  So I added a strip of ribbon to the bottom and then made a double bow using my Bow-it-all.  Have I mentioned how much I love that thing? 

Copics used:
YR04
YR18
YR68
YG95
Y08
Y17
R05
R56


I’m entering this card in:

Really Reasonable Ribbon, Challenge # 102 Autumn Colors

and

Mixed Media Card Challenge!
 
Thanks for stopping by and please come again.


Friday, May 2, 2014

Brides and Babies

I'm a bit overdue in posting a new project.  The month of April just got away from me.  So I've got 2 cards for you this time.  I needed to make a wedding card for a co-worker and a baby shower card for a family friend.
 
For the wedding card, I took inspiration from the bride's struggle to find the right table linens.  She had seen a photo of a table setting that she really liked but she was having trouble finding the right linens.  The goal was champagne linens with a sheer overlay with a champagne/ pale gold swirl.  And it took her forever to fine what she was looking for.  So I used that for the background.


For the base, I stamped the swirls in Brilliance Galaxy Gold on a pale yellowy cream.  (I need to pick up some more cream cardstock).  To mute the effect, I topped it with vellum.  I used glue in the corners to attach the vellum and then used the pearls to cover the glue spots.
 
The focal image was stamped in Versafine Onyx Black on the same pale yellowy cream cardstock.  I didn't plan to cover it with vellum but the cardstock was too bright without it.  So I again glued the corners.  I covered the bottom corners with Liquid Pearls and the top with the bow.  I mounted it on a shimmery yellow cardstock.  When that blended to much into the background, I mounted it on a darker shimmery yellow/gold cardstock.
 
The bow is a double bow that I created with my new Zutter Bow-It-All, which is awesome.  I have always had trouble making pretty bows.  I've got  a Bow Easy, which is great if you are using very thin ribbon, but not so great with wider ribbons.  I had been seeing bows made with the Bow-It-All and a few weeks ago, a broke down and bought one from Amazon.  I am mostly glad I did.  My only hesitation in saying I'm thrilled with it is that Zutter just came out with a new one that will make triple bows.  Dang it.  If I had known, I probably would have waited until the new one came out.  Oh well.  I am thrilled with the bows I'm creating with it.  Here's a close up of the bow:


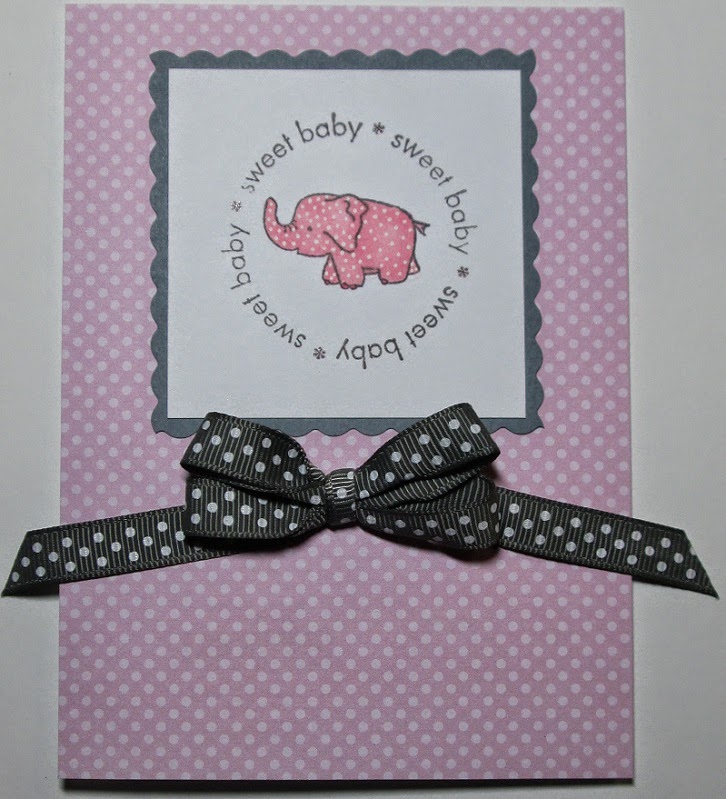
For the baby card, the friend is having a little girl and the theme is elephants.  So I kept the card fairly simple. 


I stamped the elephant in grey and colored with Copics.  Then I went back and added white polka dots.  I used the scallop blade for my paper trimmer to cut the mat.  I made the bow with my Bow-It-All and the ribbon is from Really Reasonable Ribbon's April Ribbon Club.  If you are a ribbon junky, like me, you need to check out Really Reasonable Ribbon.  Or maybe you shouldn't. :-)  In addition to buying a bunch of ribbon from there recently, I joined the monthly ribbon club.  Each month I will be getting a new collection of 7-9 ribbons (around 15 yards of ribbon). April's was grey and yellow.  And I should be getting May's soon, which is blue and red. 

Stamps Used:
Swirl - Hero Arts
Bride & Groom - Fiskar
Elephant  - Fiskar

Thanks so much for stopping by and come back soon.