After my Bunny Trouble, I decided I would give cutting a
digital stamp with my Silhouette another try.
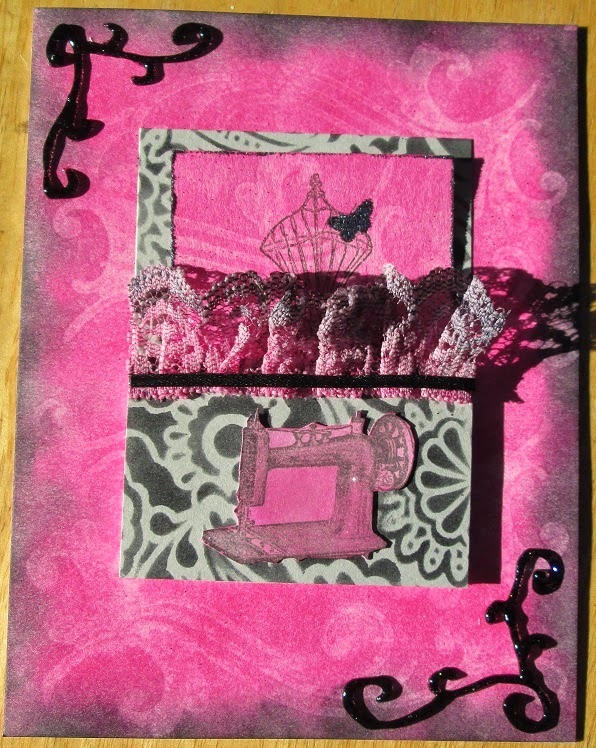
And I decided to keep it simple this time. Here is the finished card.

I used a digital image by A Day for Daisies. I just found this company last month and I really like their images.
I printed the digi stamp and used my Silhouette to cut a
label shape around the image. I’ve included step by step instructions for doing
this, with pictures. I then cut a mat
out of pattern paper to mount the image on. Here’s what they looked like after being cut:

I colored the image
with Twinkle H2Os (the eggs) and colored pencils blended with baby oil
(ducks). I actually included the mat and image in my
kit for the April Kit in an Envelope (KIAE) swap I participated in over at
2Peas. I layered it on a piece of
patterned paper. Then I added Flower
Soft to the flowers to give the card some texture. And that’s it.
Here's a close-up of the Flower Soft:

Step by Step - Using Silhouette to Cut a Shape Around a Digi Stamp
Step 1
Open your silhouette studios software. To hopefully assist in identifying which icons I’m talking about, across the top, there are 12 groups of icons on the toolbar. Down the side, there are 7 groups. And along the bottom, there are 5. I’ll use these numbers to help identify the different icons for the functions that you will need to use. For the toolbars along the top and bottom, I’ll count from left to right, unless otherwise indicated.

Now that you’ve got the software open, go either to file and
then click open or click on the little open file folder icon. The open file
icon is icon #2 in group #1 along the top.
Step 2
In the file open window, pick the folder where you have your digital stamps. When you do this, the window will probably be empty. Here's a picture of what happens when I go t open the digi:

The first time I did this, I freaked for a second before
realizing that I needed to adjust the file type. You need to go to the bottom of that window
and change the file type setting. When
you first opened the window, it was set on silhouette studio (*studio). If you change it to all file types, your
digital images should show up.


Step 3
Once you have your digital image open, you may need to
resize the image. Since my ducks are
just fine the way they are, I’ll show you another image that is a bit too large
for a card without resizing. This is A
Day for Daisies digi stamp that measures almost 5x5 when first opened.

To resize, click on the icon to open the scale window. It is icon #3 in group #10 (or the third
group from the right). If you haven’t
clicked on the image, the values for the dimensions will be blank.

Once you click the image, you will see in the scale window
the dimensions for your image. Before
you adjust the size, be sure to click the box to lock the aspect ratio. If you don’t, you will distort your image.
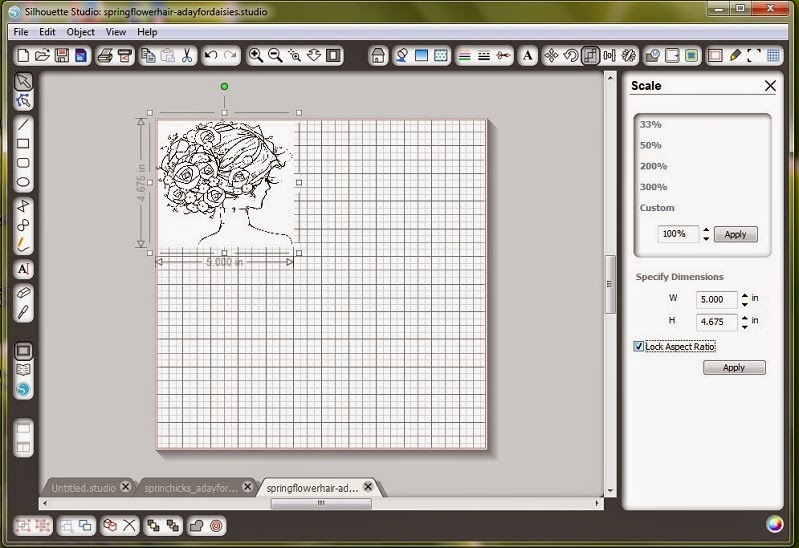
Here's the resized image:

Step 4
Going back to my ducks, once your image is the size you
want, you will want to click on the icon to open the registration mark
window. It is #3 in the last group along
the top. Once it is open, you will want
to check the box for show reg marks.
When you print the image, the registration marks will print too. Then your silhouette will read the
registration marks when you go to cut.
This is supposed to ensure that your image gets cut out properly. Here’s what that looks like.

At this point, you will want to move your image out of the
grey area. Since you will be putting a
shape around it, for now it might be easiest to move the image to the very
center.

Step 5
Now we add the shape.
Go to your library. It is icon #2
in group #6 down the left side and looks like an open book. Once there, pick the shape you want to
use. I used a file that had several
label shapes. Once you click on the
shape, it will open in the same document as your image. If it is grouped with several shapes, like
mine was, right click on the shapes and then pick ungroup. Or you can click on icon #2 in group #1 at the
bottom.

Once they are ungrouped, separate out the shape you want and
delete the rest.

Place the shape over your image.

You will probably
have to resize it. You do that the same
way as in Step 3. It may take a couple
of go rounds to get it just right. And
it will be easier if you zoom in (icon #1 in group #5 at the top – the
magnifying glass with the plus sign in it).
Sometimes the zoom in gets carried away and brings you too close, just
click on the zoom out (icon #2 in group #5 at the top – the magnifying glass
with the minus sign in it). I just
eyeballed lining it up.

If you are going to move your image, to ensure that
everything stays lined up the way you want, you will want to highlight both the
shape and the image. Then right click
and choose group or click on icon #1 in group #1 at the bottom. Now that they are grouped, the image and the
shape will move as one. You can also
make copies if you want to do more than one or open a different image and start
at the top. You can put as many images
and shapes on a page as you can fit.

Step 6
Step 7
Once your image is printed, put the paper on your cutting
mat and load it into your silhouette. Go to the cutting screen and select the
applicable settings for the paper you used. (Icon #2 in the last group at the
top). Then you get to cut.
Step 8 - Optional
If you want to create a mat for your image, go back to your
silhouette studio and ungroup your image and shape. And you can just get rid of the image. Then make a copy of your shape. You will want to keep the original to figure
out how big to resize the copy. Resize
the copy as described in step 3. I just
eyeballed it until it looked big enough for a mat. To help with deciding on the size, I lined up
the two shapes, so I could see how much bigger the mat was. Once you get the mat the size you want, get
rid of the original and then you can cut it out of the paper of your choice.